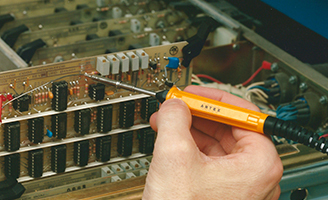
A soldering iron uses high temperatures, usually generated by electricity, to heat metal alloys to their melting point, allowing the operator to join two pieces of metal to each other. Typically made from tin, this joining metal is referred to as solder. Soldering irons heat the solder, causing the alloy to melt, which then cools and joins two pieces of metal to each other.
When this solder cools and hardens, it acts in much the same way as glue. The result of soldering is a permanent bond between the pieces, called a soldered joint. One of the most common tools for creating this metal joint is a soldering iron, uses of which are many and varied, from arts and crafts to circuit board fabrication.
Basic Types of Soldering
There are three basic types of soldering: soft soldering, hard soldering and brazing. However, the heat a regular soldering iron uses is only hot enough for soft soldering. This process uses lower temperatures, between 194-842°F (90-450°C). Typically, however, soldering irons are only used on solder that melts at 752°F (400°C) or under.
Soft soldering stresses the joined pieces least of any other soldering method, but it doesn’t make for strong joints, so isn’t practical for applications that require metal be load-bearing. To make stronger joints, it’s necessary to utilize something that heats the metal to a higher temperature, such as a soldering gun or torch.
Popular Soldering Iron Applications
There are numerous commercial, industrial and domestic soldering iron uses. These tools are additionally common for such trades as electricians, jewelers, metal workers and other craftspeople.
Some typical soldering iron uses include:
- Auto repair: Used primarily to fill irregular spaces and smooth rough surfaces, soldering irons can fill holes, fuse metal panels, tighten joints or be used for making minor repairs to the body of a vehicle.
- Circuit boards: One of the most common soldering iron uses involves electronic circuit boards, which require a metal alloy to establish an electrical current when connecting the circuitry on a board.
- DIY projects: Homeowners can use a soldering iron for numerous home repair projects.
- Electrical work: Electricians often utilize a soldering iron for splicing wiring, as well as for fusing wires to a control panel or electrical terminal.
- Jewelry: Using solder with a high silver content, jewelry makers tend to use soldering irons with interchangeable tips as their work requires a great deal of precision.
- Metal gutters: To help make gutters leak proof, metal gutters are often soldered during installation.
- Plumbing: Though larger plumbing projects normally require a torch, certain situations – like working in tight spaces – are more suitable to a soldering iron; to increase safety, plumbers also use lead-free solders for joining pipes.
- Roofing: Soldering irons with wider tips are used for certain types of metal roofing, and as per gutter installation they’re also used for exterior roof flashing to help prevent rain from intruding into the exterior walls.
- Stain glass and mosaics: Solder holds together stained glass and certain mosaics, usually requiring a stronger 100-watt soldering iron, along with a glass grinder and glass cutter.
- Vacuum tubes: Used to insulate parts and form a sealant, soldering aids in the fabrication of near-vacuums to enable electricity to pass through vacuum tubes.
How to Use a Soldering Iron
As there are numerous soldering iron uses, operators utilize this tool differently depending on the application. For example, when soldering jewelry, though an open-flame torch will provide higher temperatures, this can also be done with a soldering iron, which enables more delicate operations. Additionally, there are various techniques that can be used and which are dependent on the type of jewelry being made.
Soldering iron uses for jewelry include:
- Bending copper, silver and other metals to form rings.
- Making links for clasps by soldering bent wires.
- Soldering multiple links to make necklaces or bracelets.
Joining Wires with a Soldering Iron
A common task done by both electricians and DIYers with a soldering iron involves joining wires. It’s helpful to have a device, often referred to as a “third helping hand”, to hold cables while working. This third helping hand consists of crocodile clips to hold wires together, a weighted base and metal arms. Alternatively, a pair of pliers could be used instead.
- Strip insulation off the ends of the two wires, exposing the metal filaments.
- Twist filaments together so they intertwine into a single unit.
- Touch the tip of the soldering iron to each wire, heating them, a process called tinning the wires.
- Apply solder until wire is soaked through with it, covering all the filaments, though not so much that the wire becomes too stiff. This allows heat to spread through the filaments, making for easier soldering.
- Join wires mechanically so solder is not the only substance connecting them. To accomplish this, wrap one wire around the other, allowing sufficient space to wrap the secondary wire around the primary one.
- Heat the wires where they join mechanically while applying solder. Fill all spaces with enough solder to form a reliable connection through which electricity can pass.
- Once connected, apply heat shrink tubing to isolate wires, keeping them shielded from external forces. This tubing shrinks when heat is applied, which then adheres tightly to wiring to create a protective and form-fitting covering.
Soldering Printed Circuit Boards
The soldering of components onto a printed circuit board (PCB) is also commonly done with soldering irons.
- Begin with the tallest components, soldering interconnected wiring last.
- Place through-hole components in correct holes, making sure they sit flush on the board.
- Bend component marginally to keep it stationary.
- Heat soldering iron and, once it reaches appropriate temperature, touch the pad in order to heat both the component’s metal and the pad. Correct temperatures are vital, as temperatures that are too high may damage the board and components, while temperatures that are too low won’t create a joint sufficient for making an electrical connection.
- Apply solder so that it flows around the component in liquid form, using enough to make solid connections without gaps though not so much that there’s excess solder.
- Draw soldering iron directly upwards from the part being soldered, which should result in a solder joint shaped like a cone.
- Check the joint, ascertaining that it’s shiny in appearance, not too much solder was used and there aren’t any gaps.
- Should the solder joint be satisfactory, cut any excess from the component above the joint.
Soldering Stained Glass
Soldering irons play an important part in making stained glass and other similar crafts.
- Ensure glass is clean and pieces fit together well prior to soldering.
- Apply copper foil to glass edges, as foil doesn’t stick to glass. Foil should be smooth so that solder flows over it evenly.
- Put on a little flux, soldering each joint to hold each in place.
- Join all seams with a layer of flux so that the coating is light and even, though not sufficient to cover the entire foil.
- Solder about a quarter inch (6.4 mm) from the piece’s edge.
- Lightly touch the heated soldering iron to the solder’s feed and copper foil.
- Move both soldering iron and solder along the foil’s seam.
- Go slower and use more solder if the seam looks flat. If solder starts spilling onto glass, move more quickly.
- Once done with the first side, flip carefully while holding the edges along the middle of the piece.
- Use a modest quantity of flux, and then solder the other side.
- Tin outside edges to finish them, ensuring the copper foil is completely covered by solder.
Variations on soldering stain glass include using solid-core, rather than rosin-core or acid-core solder. Also, it’s best not to apply heat in any one place for too long, as this may cause the glass to crack or break.
Soldering Irons & Accessories from M.M. Newman Corporation
M. M. Newman Corporation carries several types of soldering irons, including both standard and miniature models made by Antex. We also carry tips and other accessories for each model. Uses vary depending on their wattage and other characteristics.
Standard & Miniature Soldering Irons
With more robust handles that provide better finger support, Antex standard soldering irons allow an operator to get close to a workpiece while improving control when soldering. Offering superior thermal efficiency, they work particularly well for soldering bulkier workpieces.
Standard soldering irons available:
- The CS 17-Watt Standard Soldering Iron uses the series 180 tips, with a tip temperature up to 700-750°F (371-399°C), with a lightweight and easy-to-handle design.
- The XS 25-Watt Standard Soldering Iron uses the series 50 tips, which reach temperatures between 750-800°F (399-427°C), working well for larger components.
- The 12 Volt Auto Repair Kit, an industrial-grade soldering iron used for emergency repairs, includes a 15-foot (about 4.6 meters) cord with alligator clips for connecting to a 12-volt automotive or marine battery.
The miniature Antex models heat more quickly and feature cooler handles, along with faster recovery times.
Miniature soldering irons available:
- The Model M 12-Watt Miniature Soldering Iron uses the series 140 tips, working well for reworking heat-sensitive components and for soldering miniature electronic prototypes, along with providing optimal thermal efficiency that heats tips up to 600-650°F (about 316-343°C).
- The Model C 15-Watt Miniature Soldering Iron uses the series 140 tips and is ideal for applications requiring higher heat, such as precision electronic prototyping, assembly and reworking processes; it heats tips up to 665- 700°F (about 350-370°C).
- The Model G 18-Watt Miniature Soldering Iron uses the series 140 tips, providing the highest wattage and most robust design of any available miniature soldering iron; tip temperatures reach 700-750°F (about 370-398°C).
Soldering Iron Tips & Accessories
M. M. Newman Corporation also carries a number of tips and other accessories for soldering irons. All tips slide easily over a soldering iron’s heating element.
Types of tips and accessories available:
- Series 180 tips for CS, TCS, SD and TC50 standard soldering iron models are strong and more conductive at higher temperatures; they’re recommended for applications requiring tips that wear longer.
- Series 50 tips for the XS and MLXS-12 standard soldering iron models are perfect for more intensive soldering applications.
- Series 140 tips for the M, C, G and TC25A miniature soldering iron models feature a multilayer construction, offering strength and conductivity at higher temperatures.
- Sponge trays made from non-charring plastic provide a place to wipe soldering tips clean.
- These iron stands can hold any miniature soldering iron, providing airflow necessary for quickly dissipating heat.
- Model ST-6 stands fit standard soldering irons, featuring a metal base plate to provide extra stability and storage area that can hold four tips.
Dial-Temp temperature controllers work with any soldering iron between 15-1600 watts, complementing work on heat-sensitive, electronic assemblies and components. This will allow you to lower the heat on your soldering iron to as low as 150°F.


