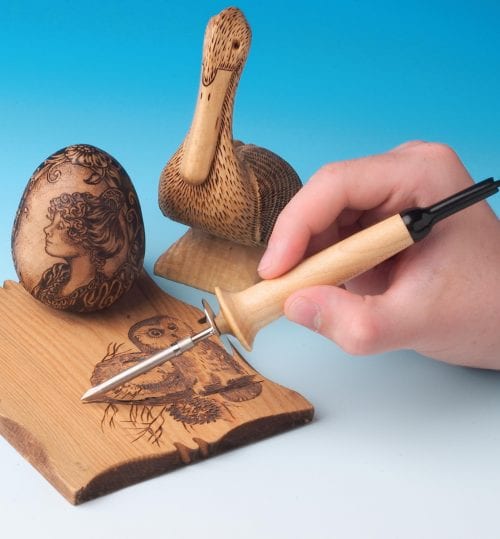
“Pyrography is the art of burning visuals onto any chosen material.” Jack Visser
Pyrography is an art practiced by disparate cultures worldwide for thousands of years, including ancient societies in China, Rome, Egypt and Peru. Over a thousand years ago in South America, the Nazcas used pyrography to engrave a small wooden cup with hummingbirds drinking nectar. During China’s Han Dynasty, it was known as “fire needle embroidery” and involved heating metal rods to create intricate designs on both leather and wood.
The actual term “pyrography” originates from the Victorian era. In the early 1900s, an architect by the name of Alfred Smart found that by heating benzene and pumping it through a hollow, heated pencil, artists could create shading in their artwork. It also allowed tools to stay hot throughout the process. The early 20th century saw soldering pens developed, which later became electrified, and it’s from this basic design that all modern pyrographic tools come.
What is Pyrography & How is it Different from Woodburning?
Pyrography comes from the Greek word “pyro” – meaning “fire” – and “graphos” – meaning “writing”. It essentially refers to anything written or carved on a surface using fire or heat, and translates broadly into “writing with fire”.
The term “woodburning” is often used as a synonym for the art, as wood is the most common medium used. However, any receptive surface can be used for pyrography, and through time artists have used clay, leather, and even gourds as surfaces on which to draw their designs. Pyrography has also been used to decorate kitchenware, musical instruments, tools and other items, as a way to make these things unique and to distinguish ownership.
So, in essence, woodburning is just pyrography done on wood. For those looking to get started with wood-based pyrography, here are some pros and cons for various types of wood:
- Beech is an economical option and its pale wood allows artists to create striking visuals, though its grain pattern may sometimes cause the design to come out less than perfect. Sap can also seep from the wood when heated, causing difficulties.
- Jelutong is versatile timber, used widely in artistic woodworking projects for pattern work, whittling, carving and making models. It’s ideal for a piece that involves both pyrography and one or more of these other wood-working disciplines.
- Maple offers one of the best choices of wood for pyrography. With its light to medium color and subtle grains, maple readily highlights a drawing’s finer details. Its only real downside is the expense, though maple’s hardness also requires higher quality heating tools because of its hardness.
- Poplar offers an economical choice for many pyrography artists and is great for routine projects. Its lighter color and inconspicuous graining make it possible to burn vivid patterns into the wood, though poplar’s downside is that sometimes sap or resin spots can cause colors to streak.
Other light-colored hardwoods – including sycamore, basswood and birch – are also used because of their fine grains, though ash, oak and pine can be used as well. Steer clear of dark or grainy woods as well as those with rough or uneven surfaces, as these characteristics distort designs. Working with woods with lots of resin can also cause difficulties. Reclaimed wood should generally be avoided as well, especially if it’s treated or finished with synthetic materials, as when heated these can release toxic fumes from the chemicals used.
The Tools of the Trade
For those looking for a reliable tool for pyrography burning, vlogger and third-generation artist, Jack Visser recommends the WB-1 Woodburner; a simple pyrography tool made by M. M. Newman for his burning. He refers to his pyro-pen – engraved with the moniker “Hot Tools Inc” – as the “most underrated pyrography tool” he owns. Its simplicity is what makes it, he says, and it’s this same 50-year-old tool used by both his grandmother and father that he uses most often in his work. Though not the most versatile tool for shading, an additional heat temperature control device is available for such detailed work.
A well-established artist based in Edinburgh in Scotland, Visser used this woodburning tool to develop his pyrography skills. Specializing in wildlife, though also dabbling with portraits, he has developed his art to a point where it’s now highly sought after. Visser produces about one burning per week, each piece designed in his own unique style and carefully burned over the course of several days.
Other tools he uses include:
- A mini blowtorch with multiple attachments to create refined burn lines and make larger areas black.
- A rotary tool to create highlighted details with a rough, sandpaper-like cylinder tip.
- A tea strainer to keep tools clean.
- Butane gas for the blowtorch.
- Plastic coat sealant to finish the piece and protect it from ultraviolet sunlight to keep it from fading.
Now, knowing what’s in his pyrography kit and the tools that he uses – especially his hard-tipped model WB-1 pyro-pen by M. M. Newman Corporation – you too can start experimenting on your own pyrography artwork. Check out the full range of hot tools from M.M. Newman Corporation.
Jack is also an overseas distributor for M.M. Newman Corporation and you can purchase a WB-1 on his website.
Commercial Pieces Created with the WB-1
Another company that makes wonderful pieces ranging from beds to lazy susans is Sticks. Many of their beautiful handmade pieces are burned with the WB-1. You can check out all of the amazing pieces they make at Sticks Object Art & Furniture.

